🇺🇸 Happy Fourth everyone! ‘Murica Fuck Yeah! 🇺🇸
If you haven’t heard yet, we recently got a Ford Transit cargo van and are currently converting it to a camper van. It will be our ultimate ad-van-ture vehicle.
These past 3 weeks, we focused on learning about van flooring and building it. I watched countless YouTube videos and read many blogs to see the different options that were available out there and there’s a lot! We settled with the instruction of this particular blog/YouTube person. His step-by-steps for the flooring was greatly helpful in giving me an understanding of what needed to be done. There are many ways one can build a van depending on their needs. This is what we’ve done:
Initial Setup
2006 Ford Expedition
We always like the versatility of our SUV, the ability to sleep in the back & the small but convenient kitchen kit. The SUV itself was insulated enough for our need. As backpackers, we are accustomed to sleeping in cold weather and being comfortable. We used our time car camping in the SUV to give us a frame of reference of what we’d need for the van.
We are not planning on insulating the van to an extreme as we plan on being in areas where it’s warm enough. If we ever end up in cold weather, a small portable heat source, such as a Mr. Buddy heater, will work plenty for us.

Our old setup
2017 Ford Transit Van conversion
Sound deadener
First task was to install the ‘Sound deadener’ material to cover the wheel wells to reduce the noise while driving. The installation was easy as it was a peel and stick type of material. We can definitely tell the different when driving now.

Peel and stick sound deadener around the wheelwell
Insulating the floor
We purchased poly-iso board and laid it on the floor. One Two can of 3M 90 glue worked great to fix the boards to the van floor. I used ‘Great Stuff’ insulating foam to fill in the gaps between those boards and the van’s floor. I let everything dry overnight and cut the excess off to make the floor as even as possible the next day. We had to keep in mind if we lay anything thick on the floor, we would lose head room in the van. Bryan, being 6’3″, we wanted to keep as much height as possible. We also installed a thin cushion layer between the plywood and the foam boards that also acts low insulating layer to the floor. We used Reflectix and glued it down with the same 3M 90 can we had.

Poly-iso board and insulating foam.

a Hacksaw was used to cut the excess foam
Plywood for the floor
I purchased 3 sanded 15/32″ plywood pieces and made paper templates out of builder paper of the wheelwells and van middle ribs. We were able to borrow a jig saw from a neighbor in the RV park. (Thanks Tom!) Measure twice and cut once! We have applied a light layer of shellac coating to the wood to provide a light protective coating.

Fits like a glove!
Fixing the floor to the van’s body.
From underneath the vehicle, we drilled holes through the van and our plywood floor. We fastened the bolt and sprayed an undercoating to prevent rust. The floor is now forever-ish affixed to the body of the van! The tutorial said to put in about 18 bolts. We realized that most of the areas that would be good to bolt down, were inaccessible underneath the van because of the different car parts like the gas tank, drive shaft and other parts (I’m clueless when it comes to car parts) etc…
Applying vinyl sheet
On Monday, I got my vinyl glue and trowel out and started laying the glue on the plywood. Our trowel had large notches which dispensed a lot more glue than needed, yikes! I unrolled the vinyl sheet on top of the glue and used a piece of wood wrapped in a shirt to roll any bubbles out. Many still remained despite our effort. Most of the floor will be covered with furniture in the next few weeks so we’re not too worried. We applied a light layer of silicone around the floor where it meets the wall for added protection.
Framing
I bolted down multiple 2×1 wood beams to the metal wall of the van. This will serve as our main frame once we start building the furniture. We’ll screw the furniture to these beams. Cargo vans are built to be customized, it already had several 3/8″ holes in the wall that I was able to use to bolt my frame to.
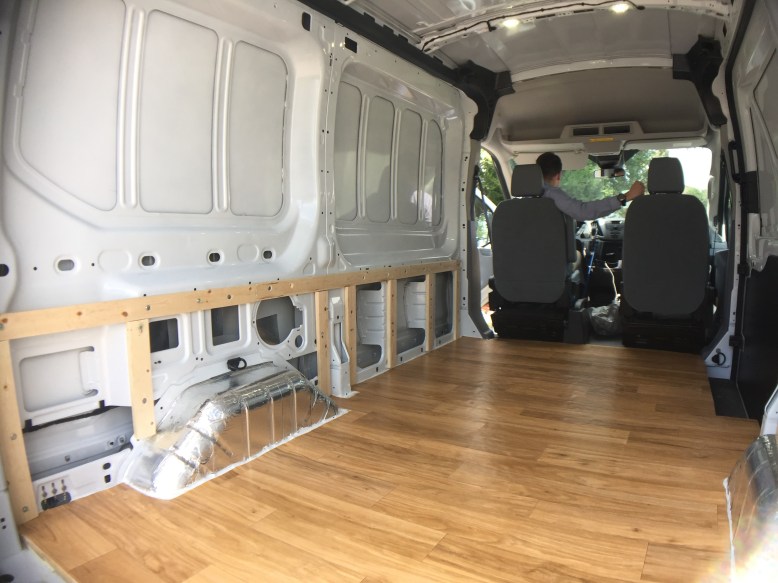
Initial frame
Floor Trim
The final task was to add the trims to the exposed sides of the floor. We chose step trims and carpet trim to finish. Initially, we wanted a silver trim but that changed when we saw this brass color that looked great with the flooring. We used a hacksaw and jigsaw to cut the trim and created the 45° angle where they meet.
Et Voilà! The floor is now done and we can start partying working some more in there. We hit plenty of bumps in the road (HA!) but we’re happy with the results. There’s a lot more ahead of us but we’ll take a break and focus on backpacking and adventuring since we haven’t done that in FOREVER.
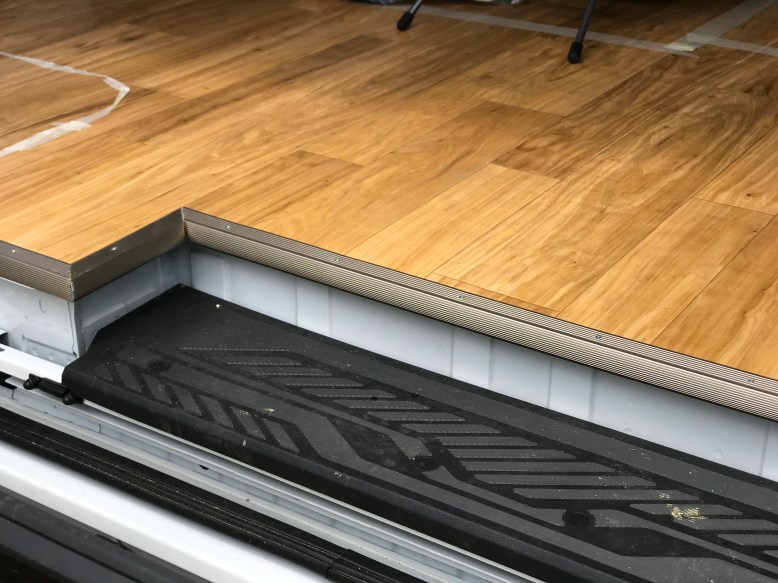
Floor trim installation
*This is how we’ve done our flooring but there are other ways and material that can be used.

Awesome … so happy for you guys !!!! looking really GreAte … where’s the TiKi Bar going ???
>
LikeLiked by 1 person
We’ll put a fully stocked bar on the roof! 😉
LikeLike
If living by a river and becoming a motivational speaker doesn’t work out, you could also use this van to drive around and solve mysteries. Of course then you’d have to get a dog.
Scooby-Dooby-Doo!
LikeLiked by 1 person
As long we get free scooby snacks! Count me in!
LikeLike
Wow what a great job. You will make it work for you, I can see that. Take care. ❤
LikeLiked by 1 person
Thanks Barb! We’re always learning along the way. We can’t wait to take it out on a trip once it’s done 🙂
LikeLike